Saturday, 23 May 2020

My "Eid Mubarak" Egg Carton Wreath - 30 Day Craft Challenge

My "Eid Mubarak" Egg Carton Wreath - 30 Day Craft Challenge


Salam, first of all, so sorry for the "hiatus" - the last couple of days have been quite busy! Eid preparations are in full swing, and, although we have been crafting every day - I just haven't had the time to post our crafts! Today's post represents Day 25 of the Crafting Challenge and there were only 5 days left before Eid so you can guess how excited the kids were. They wanted to make sure all of our crafts were related to Eid. Today we made another decoration to enjoy the Eid ul Fitr festivities.

Once again, the items I used for this craft were easily found within the house. Today we used an empty egg carton to make a hanging wreath! The finished product looks amazing and we are so happy. Take a look below to see how we took an empty egg carton and transformed it into a beautiful piece of decor for our home!

Materials:

  • Egg carton - ours was an 18-egg one
  • Paint - we used acrylic paint and we chose three colours
  • Paint brushes
  • Palette
  • Paper Plate
  • Glue gun
  • Stickers or glitter to decorate
  • Scissors and I also used an Xacto knife 
  • Two strips of paper and markers
    Some of the items we used


Steps:
  1. Cut and separate each egg compartment from the egg carton (I used an Xacto knife to help with this part) 
    Start cutting these all out individually! An Xacto knife helps
  2. Use scissors to trim the loose pieces around the egg cartons
  3. Begin painting - we chose three colours and painted 6 of each colour 
    Here's how they look once they've been painted with acrylic paints
  4. Allow these to dry - we placed ours in the sun for very fast drying
  5. Cut a large circle in the middle of your plate - you have the option of painting this paper plate or leaving it as is. Ours was already a floral theme so I didn't paint it 

  6. Once the painted egg cartons are dry - start using your hot glue gun to stick them on following a pattern 
    Turned out pretty nice! Now for the decorations
  7. With the extra egg cartons, decorate the outer part of the wreath
  8. Use stickers, or glitter to fill the inside of the cups - this will give your wreath a more festive look 
  9. Write Eid Mubarak on two separate strips of paper and glue or tape them to the back of the wreath so they are visible in the middle
  10. In order to hang the wreath you can use a 3M hook or ribbon, but we just used double sided tape
  11. We placed ours on our front door, but you can place it anywhere you like! 
Thank you dear friends for supporting me and joining me on this journey! I am so happy with the parents and teachers I have met along the way. Hopefully you can come back to check out our next Craft Challenge post. Five more to go!

Wednesday, 20 May 2020

My "Eid Mubarak" Lawn Sign - 30 Day Craft Challenge


My "Eid Mubarak" Lawn Sign - 30 Day Craft Challenge


Salam! As we approach the final days of the Month of Ramadan, we are beginning to prepare for the biggest celebration in the Muslim World - Eid ul Fitr. My children realized that there aren't many days left before we celebrate Eid, so they wanted to make an "Eid Mubarak" sign. For Day 24, I allowed them to get creative with painting and make their own Eid Mubarak Lawn Signs. 

I poured several different colours of paint, provided paintbrushes, sponge shapes, and poster paper and let them design their own signs! We had a lot of fun with this activity and they didn't want to stop painting! I admit, I rarely bring out the paints - its quite a bit of work to contain the mess and then clean up afterwards. However, today we were blessed with the perfect circumstances (my 18 month old daughter took a longer than usual nap) and the boys were very helpful. 

Take a look below and see if you're inspired enough to make your own Eid Mubarak Lawn Signs!

Materials:
  • Poster paper - we used 11inx14in
  • Paint - we used poster paint
  • Paintbrushes - or sponges
  • Cardboard 
  • Scissors
  • Construction paper - or any paper
  • Glue stick/School glue
  • Tape

Steps:
  1. Lay out your poster paper for your children and have the paintbrushes and paint ready
  2. Allow them to get creative, suggest moons, stars or a masjid for inspiration 
  3. I cut out some shapes from a piece of packing foam that I found - this worked quite well. 

  4. Allow their artwork to dry completely 
  5. Cut out the letters, or print out the letters, for Eid Mubarak
  6. Paste the letters on the poster 

  7. In order for the lawn signs to be secure on your lawn, decide what you would like as stakes - we used large cardboard panels 
  8. Cut out the cardboard panels, about 8-10cm in width and enough length to cover the length of the poster
  9. Optional: paint the panels if you like
  10. Tape these cardboard panels to the back of your poster 
  11. Dig holes in your lawn and slide the cardboard panels inside
  12. Refill the holes with rocks and dirt to hold the poster securely, and voila!


Note: Do bring in the Lawn Sign at any sign of rainfall or heavy winds!

My dear crafting friends, thank you so much for joining me during the homestretch of our challenge! Hard to believe that we only have 6 more crafts to go! Stay tuned to see what we have in store for the last few days of Ramadan! See you soon. 

Tuesday, 19 May 2020

My Virtue "Merit Badge" Craft - 30 Day Craft Challenge


My Virtue "Merit Badge" Craft - 30 Day Craft Challenge


Salam everyone, it's been a busy few days and I'm playing "catch up" by posting all our crafts from previous days. This craft was from Day 23. We talked about characteristics that would allow us to be good human beings. We discussed what a "virtue" is and how it makes us happy if we are able to reflect these great attributes. We made some badges to represent a few of the virtues that we brainstormed. The boys happily wore the "Merit Badge" of their choice while demonstrating the appropriate characteristics. I needed some help cleaning up our table after the craft was complete and my younger son happily wore his "Helpful" merit badge to help me complete the task!

Try this out with your little ones and see what kinds of virtues they come up with. My older son came up with the virtue, "Beneficent" and said, "Mama, I've heard that this means you want to help benefit others". We gladly made a "Beneficent" merit badge together. Follow the easy steps below to make a few of your own!

Materials:
  • A few different colours of construction paper 
  • Scissors, I also used a paper trimmer but that's optional
  • Glue stick or liquid school glue
  • Hot glue gun
  • Wooden Clothespins
  • Markers
    What we used for this craft
Check our this YouTube video to see how we did this activity: Here
Steps:
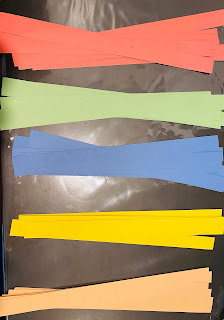
  1. Cut strips of the construction paper on the long side of your paper (about 2cm in width). You will need about 6-8 strips per merit badge
    I used a paper trimmer but you can use scissors too
  2. Now begin gluing the strips, one on top of another. Start with an X shape and keep working your way around. Try to distribute the strips as evenly as possible. 
    Gluing them one on top of the other
  3. Now glue the ends of the strips and stick them on the the centre of your badge, go around in a circle and do this for all the strips 

    Then sticking the ends to the centre
  4. Once you've glued all the ends - flatten the folds with your fingers and it should appear like the image below. 
    This is what Hadi's looked like after he was done gluing them all
  5. Cut two wider rectangles of constriction paper and cut out a triangle shape on the bottom 
    Hadi wanted his to be two different colours
  6. Glue those, one on top of the other, on the back of the badge. 
    He glued them on the back
  7. Cut a circle shape out of paper - we used white paper for this at least 10-15cm in diameter
  8. Allow your child to write their favourite virtue on this circle
  9. Glue the circle on the front of your merit badge.
    "Beneficent" got glued to the front
  10. Now, turn on your hot glue gun and use it to glue the wooden clothespin to the back of the badge
    Mama assisted with using the glue gun
  11. You should be able to clip it onto your child's shirt safely!
    Sticks right to the back
  12. Enjoy practicing all these great virtues! 
    And then on his shirt!

Lots of different virtues to work on

Thanks for joining me once again on this crafting journey! I'm finding it hard to believe that I'm posting my 23rd craft! I really appreciate all your love and support along the way. Leave a comment below to let me know if you're enjoying the crafts. 

Sunday, 17 May 2020

Our Homes "Light Up" Craft - 30 Day Craft Challenge


Our Homes "Light Up" Craft - 30 Day Craft Challenge


Salam, today I'll be posting about the craft we did on Day 22. I wanted to discuss the significance of Laylatul Qadr (The Night of Power). For this we read the book, "The Most Powerful Night", by Ndaa Hassan. It started off with the recitation of Surat al Qadr and then a beautiful description about the importance of Laylatul Qadr. Growing up, I also heard from our elders that the homes in which the people are reciting Quran and performing prayers during this night "Light Up" so that the angels can descend upon it. The angels bring peace and blessings upon this home and all its inhabitants. 

The "Lighting Up" of homes inspired our craft for the day. We used construction paper and chalk to draw houses and then we taped them together to get a 3-D effect. Once the house stood up on its own I placed an LED candle inside to allow it to light up. It created a beautiful look and the kids were mesmerized. I hope you are able to make your homes light up by following the simple steps below!

Materials:
  • Construction paper - we used black so that our chalk would appear nicely 
  • Chalk or a Chalk Marker, I found something called a "Chalk Writer" at the dollar store which worked really nicely too
  • Tape
  • Scissors
  • LED candle to place inside your home
    Today's material list was super simple
Steps:
  1. Allow your child to get creative and draw four separate houses 
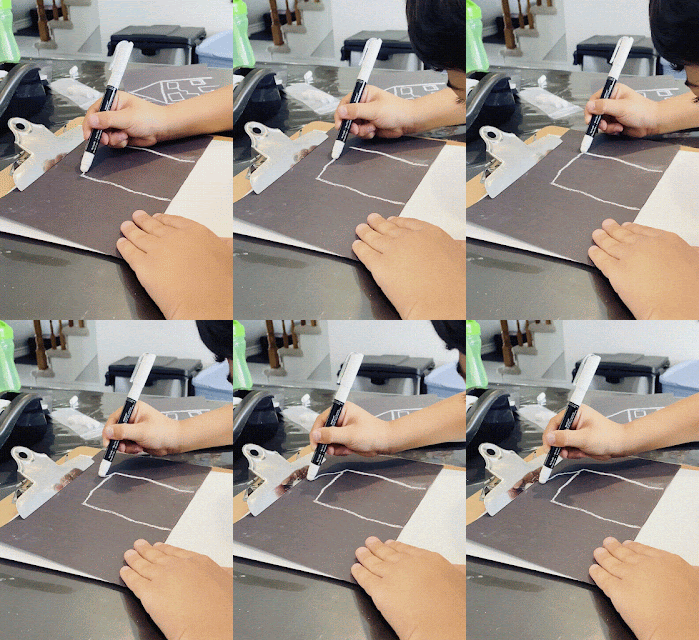
    Conventional Chalk - pretty messy
  2. At first we used conventional chalk but it became very messy and it was spreading all over the paper so we switched over to our "Chalk Writer" and were very pleased with the results 
    Definitely a great Dollar Store find!
  3. After drawing four houses, start to cut them out - we also cut out some of the windows and doors
    Getting our cutting practice 
  4. We then taped all four of the houses together in a row
    He thoroughly enjoys taping
  5. Then prop up the house and tape the final side to allow it to be a 3-D house
  6. Place and LED candle inside and watch the house "Light Up"
    The final product!
  7. Tell a story about Laylatul Qadr, and make it extra special for your child!
    We highly recommend this book for all little readers - very well written!

Thank you, once again, for visiting my blog. Please feel free to leave me a comment here or on Instagram. Don't forget to follow me @WishfulWaufa. See you tomorrow for our next craft!

Friday, 15 May 2020

My Balancing Scale "Al-Mizaan" - 30 Day Craft Challenge

My Balancing Scale "Al-Mizaan" - 30 Day Craft Challenge


Salam! We have now reached Day 21 of our Craft Challenge. Today I wanted to bring up the concept of the "Mizaan" or balancing scale. I found this to be a tough topic for my children to grasp without a visual. Before we did the craft, I spoke to them about the fact that the balancing scale, ميزان, has been mentioned in the Quran with regards to Judgement Day. Allah would like to see us with our scales tipped towards the side of "Good Deeds". We should always strive to attain as many good deeds as we can so that on the Day of Judgement we do not displease our Lord. I got a few nods, but, it wasn't until we constructed this Balancing Scale together that we had our "Aha" moments. 

I have always wanted to make a scale with my children but I always backed away thinking it would be too difficult and would require too much precision for it to be fun. However, I was completely wrong! This craft is so easy and very forgiving in terms of precision. The idea is just to give the kids a hands on opportunity with the scale to really understand how balancing works. Take a look below and you'll see!

Materials:
  • Several pieces of cardboard - I took apart a box. Largest piece was for the base, two small squares for each platform, and two long pieces for the top of the scale
  • One empty paper towel roll
  • Two brass paper fasteners
  • Scissors
  • Pencil
  • String (4 pieces about 60-80cm long each)
  • Ruler
  • Single hole punch (or scissors)
  • Two beads to help balance the scale (seen in images below)
  • Optional: Xacto knife could be helpful but sharp scissors will do just fine as well
    Pretty much all you'll need! Forgot to add a pencil and two beads here
    Check our this YouTube video to see how we made the scale: Here

    Steps:
  1. On your base piece of cardboard, right at the centre, use the paper towel roll to trace a circle with your pencil.
  2. Use your Xacto knife or a pair of scissors to cut out this circle
    Here's the circle
  3. Fit your paper towel roll right into that circle
    The roll should fit nice and snug in there
  4. Tape it very well all around
    About 4 or five pieces of tape 
  5. We even put a couple pieces of tape on the bottom 
    Two pieces of tape at the bottom
  6. Use your single hole punch (or scissors) to make a hole right at the centre of each of the long pieces of cardboard for the top of the scale
    Try to measure the centre as best as possible
  7. Then make two holes adjacent to each other on the top of the paper towel roll
    There should be two holes one that visible here and one right behind it
  8. Use your paper fasteners to secure these long pieces of cardboard to the paper towel roll
    They should fasten nicely with enough space to move freely
  9. Make four holes on each corner of your platforms
    The single hole punch came in handy for this craft!
  10. Then make holes on the edges of the top of the scale
    Pictured here are the holes we made at the ends of the long pieces
  11. Get two pieces of string for each platform 
  12. Insert them from the bottom into the holes in the platforms, forming an "X" at the bottom
    This is the X shape at the bottom of each platform
  13. Now pull them up and make sure the length of the string is equal on all sides
  14. String through a bead so that all the string goes through the bead first
  15. Then insert two strings on one side of the top of the scale and two on the other side
  16. Tie them together with a knot
  17. Do the same thing on the other platform
  18. The scale is complete!
  19. Allow your children to place different items in the bases and see which one weighs more
    They measured rocks, toys and fruits!
  20. Make sure to talk to them about always striving to have their good deeds outweigh the bad deeds!
Thanks again for taking a look at this and all the other crafts as part of the Craft Challenge! I appreciate all my visitors. Feel free to leave feedback below in the comments about how I can make this blog better. See you tomorrow!

The Best Day Ever - Greeting Card